
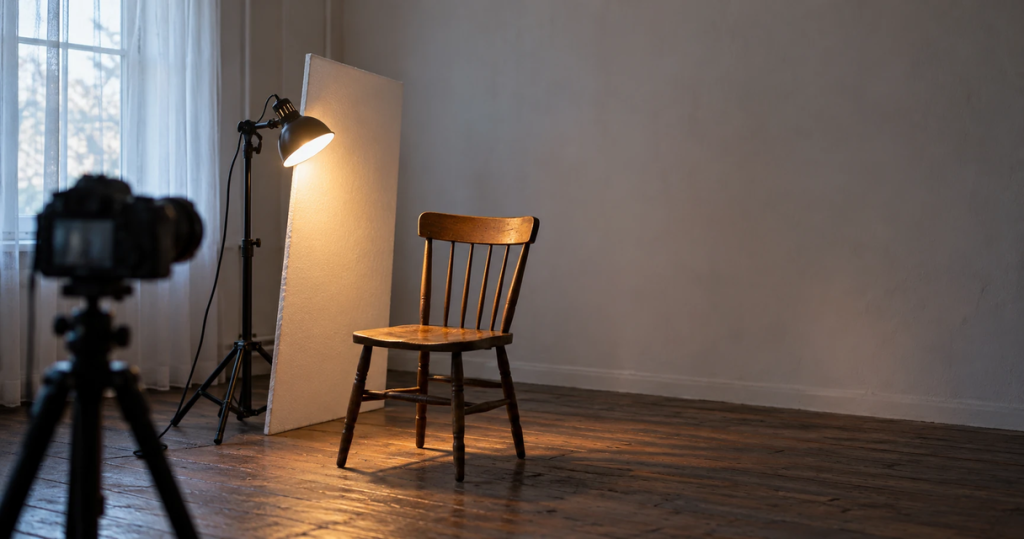
Good lighting is about control, not money. Cinematography courses teach you to shape the light you already have: a window, a white board, a cheap lamp and a dark cloth. Once you can control those, bigger lights are just more of the same idea.
Crew work in Malaysia may soon become more formal. In March 2026, FINAS told industry buyers that its FINAS Act amendment brings worker protections for cast and crew, including standardised contracts and mandatory insurance (The Hollywood Reporter, March 2026). The details will depend on the final rules. Either way, lighting crews handle heat, heavy stands and electricity every day. Learning to light safely is part of the job, not an extra.
Why beginners think they need more lights
Beginners often blame their gear. The shot looks flat, so they want brighter lights. Usually the problem is not the amount of light. It is the direction.
Light from the front, next to the camera, makes a face look flat. Light from the side shows the shape of the face, the eyes and the cheekbones. Moving one lamp a few steps to the side often does more than buying a second one.
This is the first lesson in most cinematography courses. Before you touch a new light, learn to move the one you have.
Five lessons that cost very little
1. Use the window as your main light
A window is a large, soft light source. Put your subject beside it, not facing it, and the light falls across one side of the face. Soft shadows appear on the other side. This is the same look many films create with expensive soft boxes.
Shoot when the sun is not shining straight in, or the light becomes harsh. Early morning and late afternoon are easier.
2. Bounce light back with a white board
A sheet of white foam board, or even a white wall, reflects light into the dark side of a face. Move it closer for more fill, and further away for less. You now control the shadow without a second lamp.
3. Add darkness with a black cloth
This one surprises students. Sometimes a shot needs less light, not more. A black cloth on the dark side of a face removes light bouncing off walls and makes the image look deeper. Film crews call this negative fill.
4. Soften a harsh lamp
A bare bulb makes hard, sharp shadows. Putting a diffusion material between the lamp and the subject spreads the light and softens it. Use proper diffusion fabric or sheets made for lights. Never put paper or cloth against a hot bulb.
5. Use lamps that belong in the scene
A table lamp, a fridge light or a phone screen can light a face if it is in the right place. Crews call these practicals. They make a scene feel real, because the light comes from something the viewer can see.
A simple exercise to try this week
You do not need a course to start practising. Try this with one friend and one room.
Sit your friend by a window, with the window to their left. Put your camera or phone in front of them. Take a photo. Now add a white board on their right, about an arm’s length away, and take another. Then swap the board for a black cloth and take a third.
Put the three photos side by side. The first is the window alone. The second has softer shadows. The third has deeper shadows and more shape. You have just changed the mood of a shot three times without buying a single light.
Now move your friend so they face the window. Take one more photo. It will look flatter than the others, because the light now comes from the front. That one comparison teaches the most important lighting idea there is.
Bring these photos to your first lighting class. A teacher can tell you what worked and why, which is where real progress starts.
The three-point setup, and when to break it
Most cinematography courses teach three-point lighting early.
The key light is the main light, usually to one side of the camera. The fill light softens the shadows on the other side. The back light sits behind the subject and separates them from the background with a thin edge of light.
You can build all three cheaply: a window as the key, a white board as fill and a small lamp behind as the back light.
Once you understand it, you learn when to break it. A tense scene may use only a key light and deep shadows. A bright comedy may use lots of soft fill. The rule is a starting point, not a law.
Mixing colours of light
Different lights have different colours. Daylight is blue compared with a warm household bulb. If both hit the same face, one side looks blue and the other orange.
Beginners fix this in the edit and struggle. Cinematographers fix it on set: turn off the lamp, cover the window, or use lights of the same colour. Getting this right makes colour grading much easier later.
What cinematography courses add that video tutorials cannot
You can watch lighting tutorials for free. What a course adds is a teacher standing next to your setup.
A teacher sees that your back light is too strong or that your fill is flattening the face. They make you move one thing, then look at the monitor again. That loop of change, look, change again is how lighting is learned.
A course also lets you use proper stands, lights and safety gear before you buy any. At one film school in Johor, camera techniques and cinematography are taught as a module covering lighting, framing and composition on professional equipment. The course page lists what else it covers, and the school’s main site explains how the modules fit together.
Safety habits every student should learn
Lighting brings some of the biggest risks on a set: heat, weight and electricity. Good courses teach these habits from day one:
- Weigh down every light stand with a sandbag, especially outdoors.
- Tape cables flat across walkways, or run them along walls.
- Never touch a hot lamp or cover it with paper or cloth.
- Check how much power a socket can safely take before plugging in several lights.
- Wear gloves when handling lights that have been on for a while.
These habits also matter for work. Productions want crew who do not create risks.
Where to go next
Lighting is one part of a cinematographer’s job. Framing, camera movement and choosing lenses all build on it. If you are comparing courses, the nine checks for cinematography courses in Malaysia cover lighting time, equipment and class size. Start with the one you can test this week: ask to watch a lighting class.
Frequently asked questions
Can I learn film lighting without expensive equipment?
Yes. A window, a white board, a black cloth and one or two cheap lamps are enough to learn how light shapes a face. Expensive lights give more power and control later, but the ideas are the same.
What is three-point lighting?
It is a basic setup with a key light, a fill light and a back light. The key is the main light, the fill softens the shadows and the back light separates the subject from the background.
What is negative fill in film lighting?
Negative fill means removing light instead of adding it. A black cloth or board on the dark side of a face absorbs stray light, which makes the shadows deeper and the image look richer.
Is film lighting dangerous?
It can be. Lights get very hot, stands can fall and cables can trip people. Learning to weigh down stands, tape cables and handle hot lamps safely is a core part of any good course.
Do cinematography courses teach lighting?
Most good cinematography courses teach lighting early, because it shapes every shot. Look for courses where you light real setups with a teacher checking your work, not only watch demonstrations.
 English
 Chinese